Archived
Setting Up Tailwind CSS In A React Project

Setting Up Tailwind CSS In A React Project
Blessing Krofegha 2020-02-24T11:00:00+00:00
2020-02-25T12:38:09+00:00
In the dispensation of CSS libraries and frameworks, a ton of awesome libraries have been built to simplify the work of a developer in the quest to create intuitive interfaces. However, quite a lot of them (Bootstrap, Foundation) impose design decisions that are difficult to undo; they come with predefined components, therefore, eliminating the need for dynamic customization. This is the reason why Tailwind CSS is considered to be a good choice for building 21st-century web interfaces.
With Tailwind CSS, you get to create the components that suit what you want or what you are working on. These components can be created by harnessing the power of the utility-first prowess of Tailwind CSS. If you are tired of making use of Bootstrap and its likes, you’ll find Tailwind CSS a good fit for working on beautiful interfaces as you implement the designs you need using the utility classes it provides.
In this tutorial, you will learn what Tailwind CSS is and how to work with it. In the end, you’ll have built a profile card that uses Tailwind CSS utility classes. After that, you can go on to build a portfolio website that showcases your skills and other things you have worked on.
Note: While we won’t be writing CSS in this tutorial, a good knowledge of CSS will come in handy as you work through what we will be covering.
Styling In Modern Web Apps
There are different ways of organizing styling in modern applications which often have complex interfaces and design patterns. Let’s walk through BEM, preprocessors, CSS-in-JS and even design systems to find out what works best for you. Learn more →
What Is Tailwind CSS?
Tailwind CSS is a utility–based low-level CSS framework intended to ease building web applications with speed and less focus to writing custom CSS, without leaving the comfort zone of your HTML code, yet achieve awesome interfaces.
For example, you could style a button with just a few classes (instead of always having to declare a single big class separately from your HTML and writing a bunch of properties to make something):
<button class="bg-blue-500 hover:bg-blue-700 text-white font-bold py-2 px-4 rounded ml-4 mt-4">
  Button
</button>
Other CSS frameworks (such as Bootstrap, Foundation, Bulma, and so on) present you with diverse predefined components (such as modals, buttons, alerts, cards). But with Tailwind CSS, you get to make your own, or you’re forced to make your own depending on your project model. Another way to put it, you actually own the components, and you get to harness your customization power on any component of your choice. This means that there is no more need to fight against the framework, and trying to figure out which classes need to be overridden in order to get results you initially aimed for.
Why Use Tailwind CSS?
Maybe you’re not quite ready to betray other frameworks yet, or you haven’t been convinced to embrace the goodies that come with Tailwind CSS. Allow me to give you a few reasons why you may want to consider Tailwind CSS.
No Naming Conventions
One of the most stressful parts of writing custom CSS is having to name classes. At every point, you’re pondering which class should be generic or specific. How do you organize them and ensure they’re cascaded? Tailwind CSS solves those problems seamlessly by providing utility-based classes that can be used all the time.
However, cases may arise where you need to name some classes. Sometimes this tends to happen when you need to extract certain components and use them later in your design (with the help of the @apply directives).
Cache Benefits
When writing custom CSS (or using any other traditional CSS framework), you always have to make changes to your CSS files when making changes in your designs. With Tailwind CSS, you need not worry a bit about that since you’re using the same classes over and over again within the markup. This means that you do not have to bust your CSS cache everytime in order to make small changes to your design.
When Not To Use Tailwind CSS
Are you saying I should always use Tailwind CSS for every project? Of course not! There are a few use cases where you may not want to use Tailwind CSS.
If You’re Working On A Small Projects
When you need to get started with a mini-project that has a very short deadline (especially something a few users would be using or only yourself), then Tailwind CSS is not the best option. In those cases, I’d recommend using Bootstrap, Foundation or any other framework instead. That’s because they come with predefined ready-to-use components (themes to get started with). With Tailwind CSS, you have to creatively create your own.
If You’re A CSS Beginner
Before diving into Tailwind CSS for any project, its advisable to know CSS. Beginners that desire to use Tailwind CSS for web-based projects should first master CSS to a certain degree. It provides utility classes that are linked to the underlying CSS, therefore, only those with a solid knowledge of CSS can easily build with it.
If You Dislike Adding A Lot Of Classes To Your Elements
When writing Tailwind CSS, you always have to write lots of classes, which makes your codebase (HTML) look busy and sometimes difficult to read. If you prefer keeping your code neat, you may want to consider writing custom CSS or use any other CSS framework (such as Bootstrap).
With these reasons, it’s about time to move over to the business of the day: let’s set up Tailwind CSS in a React project together!
Getting Started
To set up our project, we’ll scaffold a new React app using create-react-app. If you have already done this, skip this process, otherwise, run the command below:
npx create-react-app react-tailwindcss && cd react-tailwindcss
Next, we install a few development dependencies. You can use any of the options that work for you.
Using npm
npm install tailwindcss postcss-cli autoprefixer -D
Using Yarn
yarn add tailwindcss postcss-cli autoprefixer -D
We need to initialize Tailwind CSS by creating the default configurations. Type the command below in your terminal:
npx tailwind init tailwind.js --full
This command creates a tailwind.js in your project’s base directory; the file contains the configuration, such as our colors, themes, media queries, and so on. It’s a useful file that helps with predefined sets of properties which will aid the need to re-brand certain conventions or properties if the need arises.
How To Configure PostCSS?
The PostCSS documentation states that:
“PostCSS is a tool for transforming styles with JS plugins. These plugins can lint your CSS, support variables and mixins, transpile future CSS syntax, inline images, and more.”
Why Autoprefixer?
It’s necessary to install Autoprefixer alongside Tailwind CSS because Autoprefixer usually tracks caniuse.com to see which CSS properties need to be prefixed. Hence, Tailwind CSS does not provide any vendor prefixing. If you’re curious as a cat in regards to PostCSS navigate to their documentation.
Create a PostCSS configuration file in your base directory manually or using the command:
touch postcss.config.js
Add the following lines of code to your PostCSS file:
const tailwindcss = require('tailwindcss');
module.exports = {
    plugins: [
        tailwindcss('./tailwind.js'),
        require('autoprefixer')
    ],
};
Because PostCSS is necessary to lint our CSS, hence this configuration.
Code Steps
- We fetched the Tailwind CSS package and placed it in a variable.
- We wrapped tailwind.js (our default base configuration) in our
tailwindcssvariable. - We fetched the
autoprefixerpackage.
How To Inject Tailwind’s Components, Utilities And Base Styles To Your App
Inside your src folder create a folder, name it assets, this is where all your styles would be stored. In that folder, create a tailwind.css file and main.css file respectively. The tailwind.css file will be used by us to import Tailwind CSS styles, and for custom configurations and rules. The main.css will hold the styles that are generated as a result of what we have in the tailwind.css file.
Next, we need to import the base styles and configurations. We will do that in one of the CSS files we created above. Add the following to your tailwind.css file.
@tailwind base;

@tailwind components;

@tailwind utilities;
Note that we used the @tailwind directive to inject Tailwind’s base, components, and utilities styles into our CSS:
@tailwind base
This injects Tailwind’s base styles, which is a combination ofNormalize.cssand some additional base styles.Note: If you’d like to get the complete references of all the styles applied by Preflight, see this stylesheet.
@tailwind components
This injects any component (reusable styles like cards and form elements, etc.) classes registered by plugins based in our config file.@tailwind utilities
This injects all of Tailwind’s utility classes(including the default and your own utilities) they are generated based on our config file.
Tailwind CSS will swap these directives out at build time with all of its generated CSS. If you’re using postcss-import, use this instead:
@import "tailwindcss/base";

@import "tailwindcss/components";

@import "tailwindcss/utilities";
How To Configure Your App To Build Your CSS
Next, we need to configure our project to build our CSS styles each time we run either the npm start or yarn start command.
Open your package.json file and use the snippet below in place of the script part of your package.json file:
"scripts": {
    "start": "npm run watch:css && react-scripts start",
    "build": "npm run build:css && react-scripts build",
    "test": "react-scripts test",
    "eject": "react-scripts eject",
    "build:css": "postcss src/assets/tailwind.css -o src/assets/main.css",
    "watch:css": "postcss src/assets/tailwind.css -o src/assets/main.css"
  },
Importing Our CSS
We need to import our CSS file appropriately to ensure that it’s properly watched and built when we run yarn start or npm start.
Open your index.js file and make the following changes:
- Import our main.css file and delete
import './index.css';.
import './assets/main.css'Your *index.js* should look like this after the changes:
import React from "react"; import ReactDOM from "react-dom"; import './assets/main.css'; import App from "./App"; ReactDOM.render(<App />, document.getElementById("root")); - Head over to App.js and delete
import logo from './logo.svg';leaving onlyimport React from 'react';. Also delete everything inside theAppcomponent. (Don’t worry if our App.js looks barren now — we’ll add some code as we proceed in this post.)
Let’s Build A Profile Card Project
Now that our setup works well, and everything looks good, let’s build a Profile Card. However, I’d like to show you what the state of our app before we begin.
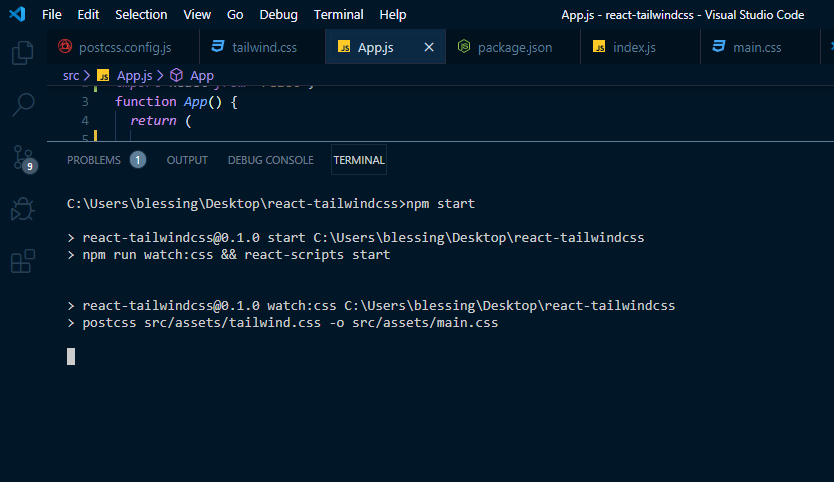
To start your app, type this command npm start or yarn start.
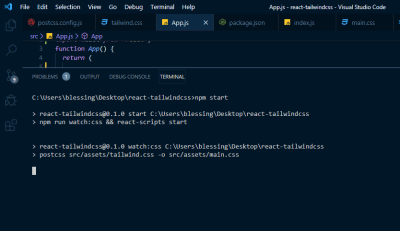
You’d observe that our Tailwind CSS is building the necessary files needed in main.css.
Let’s get started in our project.
Here’s what our code (App.js) looks like without implementing Tailwind CSS classes.
import React from 'react';
function App() {
  return (

    <div className="">
      <img className="" src={require('./profile.jpg')} alt="Display" />
      <div className="">
        <div className="">
          Blessing Krofegha
        </div>
        <p className="">
          When i'm not coding i switch to netflix with biscuits and cold tea as my companion. <span></span>😜
        </p>
      </div>
      <div className="">
        <span className="">#Software Engineer</span>
        <span className="">#Writter</span>
        <span className="">#Public Speaker</span>
      </div>
    </div>
  );
}
export default App;
The outcome of the above code snippet is thus the following:

As you can see, all of the text has been aligned to the left by default. The image is pretty big because there is no styling. The App component has four main divs to which we’ll be adding classes to. This will then, of course, change the styling of the elements.
First div
import React from 'react';
function App() {
  return (

    <div className="max-w-sm rounded overflow-hidden shadow-lg">
      <img className="w-full" src={require('./profile.jpg')} alt="Display" />
      <div className="">
        <div className="">
          Blessing Krofegha
        </div>
        <p className="">
          When I'm not coding, I switch to Netflix with biscuits and cold tea as my companion. <span></span>😜
        </p>
      </div>
      <div className="">
        <span className="">#Software Engineer</span>
        <span className="">#Writter</span>
        <span className="">#Public Speaker</span>
      </div>
    </div>
  );
}
export default App;
Code Steps
We gave the div max-width with max-w-sm for small screens and have added border-radius using the rounded class. To prevent scrolling bars from showing up, we used overflow-hidden.
On the first div, we garnished our background with a shadow effect using box-shadow with the shadow-lg class. Using this means that we’d be having a box-shadow(shadow effect) of 0px from the top, 10px from the right, 15px from the bottom, and -3px from the left (with a faint black on the left axis).
On the right axis, we’ve got 0px from the top, 4px from right, 6px from the bottom and -2px from the bottom (with a lighter shade of black rgba(0,0,0, 0.05)).
Do you mean a simple class name such as max-w-sm rounded overflow-hidden shadow-lg is responsible for all of this awesomeness? Yes! That’s the awesomeness of Tailwind CSS!
Next, we gave img a width of 100% with w-full and an src attribute and, of course, an alt attribute.
Here’s how our new Profile card should look like:

Second div
Add this class px-6 py-4 to our second div:
import React from 'react';
function App() {
  return (

    <div className="max-w-sm rounded overflow-hidden shadow-lg">
      <img className="w-full" src={require('./profile.jpg')} alt="Display" />
      <div className="px-6 py-4">
        <div className="">
          Blessing Krofegha
        </div>
        <p className="">
          When i'm not coding i switch to netflix with biscuits and cold tea as my companion. <span></span>😜
        </p>
      </div>
      <div className="">
        <span className="">#Software Engineer</span>
        <span className="">#Writter</span>
        <span className="">#Public Speaker</span>
      </div>
    </div>
  );
}
export default App;
Code Steps
In our second div, we gave it a padding-right/left of 1rem representing px-6 in the x-axis and padding-top/bottom of 1.5rem which is py-4 in the y-axis.

Third div
Add the class font-bold text-purple-500 text-xl mb-2 to our second div:
import React from 'react';
function App() {
  return (

    <div className="max-w-sm rounded overflow-hidden shadow-lg">
      <img className="w-full" src={require('./profile.jpg')} alt="Display" />
      <div className="px-6 py-4">
        <div className="font-bold text-purple-500 text-xl mb-2">
          Blessing Krofegha
        </div>
        <p className="text-gray-700 text-base">
          When i'm not coding i switch to netflix with biscuits and cold tea as my companion. <span></span>😜
        </p>
      </div>
      <div className="">
        <span className="">#Software Engineer</span>
        <span className="">#Writter</span>
        <span className="">#Public Speaker</span>
      </div>
    </div>
  );
}
export default App;
Code Steps
We set the font-weight to a value of 700 with font-bold class. Next, we gave our div a light purple color using text-purple-500 and made our font-size extra small by using text-xl. We gave our div a margin-bottom of 0.5rem by using mb-2. We also added a paragraph and made its color a darker shade of gray using text-gray-700.
We added a light text color to our paragraph with text-gray-700 and a font size of 1em using text-base. Therefore, text-base is equal font-size: 1rem and text-gray-700 is equal color: #4a5568;
Let’s see what changes were made with our 3rd div:

Fourth div
import React from 'react';
function App() {
  return (

    <div className="max-w-sm rounded overflow-hidden shadow-lg">
      <img className="w-full" src={require('./profile.jpg')} alt="Display" />
      <div className="px-6 py-4">
        <div className="font-bold text-purple-500 text-xl mb-2">
          Blessing Krofegha
        </div>
        <p className="text-gray-700 text-base">
          When i'm not coding i switch to netflix with biscuits and cold tea as my companion. <span></span>😜
        </p>
      </div>
      <div className="px-6 py-4">
        <span className="inline-block bg-gray-200 rounded-full px-3 py-1 text-sm font-semibold text-gray-700 mr-2">#Software Engineer</span>
        <span className="inline-block bg-gray-200 rounded-full px-3 py-1 text-sm font-semibold text-gray-700 mr-2">#Writter</span>
        <span className="inline-block bg-gray-200 rounded-full px-3 py-1 text-sm font-semibold text-gray-700 mt-2 ml-20">#Public Speaker</span>
      </div>
    </div>
  );
}
export default App;
Code Steps
Like the previous div mentioned above, we added a padding-right/left of 1rem representing px-6 in the x-axis and padding-top/bottom of 1.5rem respectively representing py-4 in the y-axis.
Lastly, we added a few classes to our spans which include inline-block. What this does is sets the display of the span which means the element is treated like other inline elements but allows the use of block properties.
We added a background-color of gray using bg-gray-200 and created a border-radius of 9999px using the rounded-full class; px3 adds padding to the x-axis while py-1 adds padding in the y-axis. text-sm is added to make the font-size of the text small and text-gray-700 was used to add a dark shade of gray color to the text. We went on to add margin-right to the span element.
If you’ve been carefully following along, then you should have something similar:

Note: You can replace the image with an image of your choice (preferably yours) and also personalize the content any way you wish.
Conclusion
I hope you enjoyed this tutorial. Of course, you can take always take it a bit further by making this a little profile application that says much more about you beyond the little information we have above. For example, you could go on to share a list of skillsets that you have, or add a table to projects you have worked on and possibly a contact form. Let your creativity flow, and please do share your projects in the comments section below — I’d love to see what you come up with!
-
The supporting repo for this article is available on GitHub.
-
Tailwind CSS Documentation (official Tailwind CSS website)
-
“Tailwind CSS In JavaScript,” Christoph Benjamin Weber
(ks, il)
From our sponsors: Setting Up Tailwind CSS In A React Project


