Archived
How To Build A Real-Time Multiplayer Virtual Reality Game (Part 2)


How To Build A Real-Time Multiplayer Virtual Reality Game (Part 2)
Alvin Wan 2019-12-05T11:00:00+00:00
2019-12-05T12:35:59+00:00
In this tutorial series, we will build a web-based multiplayer virtual reality game, where players will need to collaborate to solve a puzzle. In the first part of this series, we designed the orbs featured in the game. In this part of the series, we will add game mechanics and setup communication protocols between pairs of players.
The game description here is excerpted from the first part of the series: Each pair of players is given a ring of orbs. The goal is to “turn on” all orbs, where an orb is “on” if it’s elevated and bright. An orb is “off” if it’s lower and dim. However, certain “dominant” orbs affect their neighbors: if it switches state, its neighbors also switch state. Player 2 can control even-numbered orbs, and player 1 can control odd-numbered orbs. This forces both players to collaborate to solve the puzzle.
The 8 steps in this tutorial are grouped into 3 sections:
- Populating User Interface (Steps 1 and 2)
- Add Game Mechanics (Steps 3 to 5)
- Setup Communication (Steps 6 to 8)
This part will conclude with a fully functioning demo online, for anyone to play. You will use A-Frame VR and several A-Frame extensions.
You can find the finished source code here.
1. Add Visual Indicators
To start, we will add visual indicators of an orb’s ID. Insert a new a-text VR element as the first child of #container-orb0, on L36.
<a-entity id="container-orb0" ...>
    <a-text class="orb-id" opacity="0.25" rotation="0 -90 0" value="4" color="#FFF" scale="3 3 3" position="0 -2 -0.25" material="side:double"></a-text>
    ...
    <a-entity position...>
        ...
    </a-entity>
</a-entity>
An orb’s “dependencies” are the orbs it will toggle, when toggled: for example, say orb 1 has as dependencies orbs 2 and 3. This means that if orb 1 is toggled, orbs 2 and 3 will be toggled too. We will add visual indicators of dependencies, as follows, directly after .animation-position.
<a-animation class="animation-position" ... />
<a-text class="dep-right" opacity="0.25" rotation="0 -90 0" value="4" color="#FFF" scale="10 10 10" position="0 0 1" material="side:double" ></a-text>
            <a-text class="dep-left" opacity="0.25"rotation="0 -90 0" value="1" color="#FFF" scale="10 10 10" position="0 0 -3" material="side:double" ></a-text>
Verify that your code matches our source code for Step 1. Your orb should now match the following:
This concludes the additional visual indicators we will need. Next, we will dynamically add orbs to the VR scene, using this template orb.
2. Dynamically Add Orbs
In this step, we will add orbs according to a JSON-esque specification of a level. This allows us to easily specify and generate new levels. We will use the orb from the last step in part 1 as a template.
To start, import jQuery, as this will make DOM modifications, and thus modifications to the VR scene, easier. Directly after the A-Frame import, add the following to L8:
<script src="https://code.jquery.com/jquery-3.3.1.min.js"></script>
Specify a level using an array. The array will contain object literals that encode each orb’s “dependencies”. Inside the tag, add the following level configuration, :
     <script>
var orbs = [
  {left: 1, right: 4},
  {},
  {on: true},
  {},
  {on: true}
];
    </script>
For now, each orb can only have one dependency to the “right” of it and one to the “left” of it. Immediately after declaring orbs above, add a handler that will run on page load. This handler will (1) duplicate the template orb and (2) remove the template orb, using the provided level configuration:
$(document).ready(function() {

  function populateTemplate(orb, template, i, total) {}

  function remove(selector) {}

  for (var i=0; i
Next, populate the remove function, which simply removes an item from the VR scene, given a selector. Fortunately, A-Frame observes changes to the DOM, and thus, removing the item from the DOM suffices to remove it from the VR scene. Populate the remove function as follows.
  function remove(selector) {
    var el = document.querySelector(selector);
    el.parentNode.removeChild(el);
  }
Populate the clickOrb function, which simply triggers the click action on an orb.
function clickOrb(i) {
  document.querySelector("#container-orb" + i).click();
}
Next, begin writing the populateTemplate function. In this function, begin by getting the .container. This container for the orb additionally contains the visual indicators we added in the previous step. Furthermore, we will need to modify the orb’s onclick behavior, based on its dependencies. If a left-dependency exists, modify both the visual indicator and the onclick behavior to reflect that; the same holds true for a right-dependency:
function populateTemplate(orb, template, i, total) {
    var container = template.find('.container');
    var onclick = 'document.querySelector("#light-orb' + i + '").emit("switch");';

    if (orb.left || orb.right) {
      if (orb.left) {
        onclick += 'clickOrb(' + orb.left + ');';
        container.find('.dep-left').attr('value', orb.left);
      }
      if (orb.right) {
        onclick += 'clickOrb(' + orb.right + ');';
        container.find('.dep-right').attr('value', orb.right);
      }
    } else {
      container.find('.dep-left').remove();
      container.find('.dep-right').remove();
    }
}
Still in the populateTemplate function, set the orb ID correctly in all of the orb and its container’s elements.
    container.find('.orb-id').attr('value', i);
    container.attr('id', 'container-orb' + i);
    template.find('.orb').attr('id', 'orb' + i);
    template.find('.light-orb').attr('id', 'light-orb' + i);
    template.find('.clickable').attr('data-id', i);
Still in the populateTemplate function, set the onclick behavior, set the random seed so that each orb is visually different, and finally, set the orb’s rotational position based on its ID.
    container.attr('onclick', onclick);
    container.find('lp-sphere').attr('seed', i);
    template.attr('rotation', '0 ' + (360 / total * i) + ' 0');
At the conclusion of the function, return the template with all the configurations above.
return template;
Inside the document load handler and after removing the template with remove('#template'), turn on the orbs that were configured to be on initially.
$(document).ready(function() {
  ...
  setTimeout(function() {
    for (var i=0; i
This concludes the Javascript modifications. Next, we will change the template’s default settings to that of an ‘off’ orb. Change the position and scale for #container-orb0 to the following:
position="8 0.5 0" scale="0.5 0.5 0.5"
Then, change intensity for #light-orb0 to 0.
intensity="0"
Verify that your source code matches our source code for Step 2.
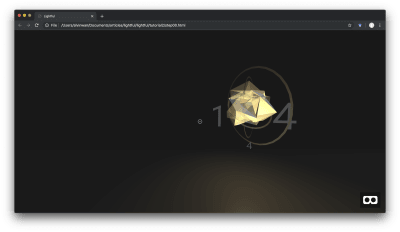
Your VR scene should now feature 5 orbs, dynamically populated. One of the orbs should furthermore have visual indicators of dependencies, like below:
This concludes the first section in dynamically adding orbs. In the next section, we will spend three steps adding game mechanics. Specifically, the player will only be able to toggle specific orbs depending on the player ID.
3. Add Terminal State
In this step, we will add a terminal state. If all orbs are turned on successfully, the player sees a “victory” page. To do this, you will need to track the state of all orbs. Every time an orb is toggled on or off, we will need to update our internal state. Say that a helper function toggleOrb updates state for us. Invoke the toggleOrb function every time an orb changes state: (1) add a click listener to the onload handler and (2) add a toggleOrb(i); invocation to clickOrb. Finally, (3) define an empty toggleOrb.
$(document).ready(function() {
  ...
  $('.orb').on('click', function() {
    var id = $(this).attr('data-id')
    toggleOrb(id);
  });
});

function toggleOrb(i) {}

function clickOrb(i) {
  ...
  toggleOrb(i);
}
For simplicity, we will use our level configuration to indicate game state. Use toggleOrb to toggle the on state for the ith orb. toggleOrb can additionally trigger a terminal state if all orbs are turned on.
function toggleOrb(i) {
  orbs[i].on = !orbs[i].on;
  if (orbs.every(orb => orb.on)) console.log('Victory!');
}
Double-check that your code matches our source code for Step 3.
This concludes the “single-player” mode for the game. At this point, you have a fully functional virtual reality game. However, you will now need to write the multiplayer component and encourage collaboration via game mechanics.
4. Create Player Object
In this step, we will create an abstraction for a player with a player ID. This player ID will be assigned by the server later on.
For now, this will simply be a global variable. Directly after defining orbs, define a player ID:
var orbs = ...

var current_player_id = 1;
Double-check that your code matches our source code for Step 4. In the next step, this player ID will then be used to determine which orbs the player can control.
5. Conditionally Toggle Orbs
In this step, we will modify orb toggling behavior. Specifically, player 1 can control odd-numbered orbs and player 2 can control even-numbered orbs. First, implement this logic in both places where orbs change state:
    $('.orb').on('click', function() {
        var id = ...
        if (!allowedToToggle(id)) return false;
        ...
    }
...

function clickOrb(i) {
    if (!allowedToToggle(id)) return;
    ...
}
Second, define the allowedToToggle function, right after clickOrb. If the current player is player 1, odd-numbered ids will return a truth-y value and thus, player 1 will be allowed to control odd-numbered orbs. The reverse is true for player 2. All other players are not allowed to control the orbs.
function allowedToToggle(id) {
  if (current_player_id == 1) {
    return id % 2;
  } else if (current_player_id == 2) {
    return !(id % 2);
  }
  return false;
}
Double-check that your code matches our source code for Step 5. By default, the player is player 1. This means that you as player 1 can only control odd-numbered orbs in your preview. This concludes the section on game mechanics.
In the next section, we will facilitate communication between both players via a server.
6. Setup Server With WebSocket
In this step, you will set up a simple server to (1) keep track of player IDs and (2) relay messages. These messages will include game state, so that players can be certain each sees what the other sees.
We will refer to your previous index.html as the client-side source code. We will refer to code in this step as the server-side source code. Navigate to glitch.com, click on “new project” in the top-right, and in the dropdown, click on “hello-express”.
From the left-hand panel, select “package.json,” and add socket-io to dependencies. Your dependencies dictionary should now match the following.
  "dependencies": {
    "express": "^4.16.4",
    "socketio": "^1.0.0"
  },
From the left-hand panel, select “index.js,” and replace the contents of that file with the following minimal socket.io Hello World:
const express = require("express");
const app = express();

var http = require('http').Server(app);
var io = require('socket.io')(http);

/**
 * Run application on port 3000
 */

var port = process.env.PORT || 3000;

http.listen(port, function(){
  console.log('listening on *:', port);
});
The above sets up socket.io on port 3000 for a basic express application. Next, define two global variables, one for maintaining the list of active players and another for maintaining the smallest unassigned player ID.
/**
 * Maintain player IDs
 */

var playerIds = [];
var smallestPlayerId = 1;
Next, define the getPlayerId function, which generates a new player ID and marks the new player ID as “taken” by adding it to the playerIds array. In particular, the function simply marks smallestPlayerId and then updates smallestPlayerId by searching for the next smallest non-taken integer.
function getPlayerId() {
  var playerId = smallestPlayerId;
  playerIds.push(playerId);

  while (playerIds.includes(smallestPlayerId)) {
    smallestPlayerId++;
  }
  return playerId;
}
Define the removePlayer function, which updates smallestPlayerId accordingly and frees the provided playerId so that another player may take that ID.
function removePlayer(playerId) {
  if (playerId
Finally, define a pair of socket event handlers that register new players and un-register disconnected players, using the above pair of methods.
/**
 * Handle socket interactions
 */

io.on('connection', function(socket) {
  socket.on('newPlayer', function() {
    socket.playerId = getPlayerId();
    console.log("new player: ", socket.playerId);
    socket.emit('playerId', socket.playerId);
  });

  socket.on('disconnect', function() {
    if (socket.playerId === undefined) return;
    console.log("disconnected player: ", socket.playerId);
    removePlayer(socket.playerId);
  });
});
Double-check that your code matches our source code for Step 6. This concludes basic player registration and de-registration. Each client can now use the server-generated player ID.
In the next step, we will modify the client to receive and use the server-emitted player ID.
7. Apply Player ID
In these next two steps, we will complete a rudimentary version of the multiplayer experience. To start, integrate the player ID assignment client-side. In particular, each client will ask the server for a player ID. Navigate back to the client-side index.html we were working within Steps 4 and before.
Import socket.io in the head at L7:
<script src="https://cdnjs.cloudflare.com/ajax/libs/socket.io/2.1.1/socket.io.js"></script>
After the document load handler, instantiate the socket and emit a newPlayer event. In response, the server-side will generate a new player ID using the playerId event. Below, use the URL for your Glitch project preview instead of lightful.glitch.me. You are welcome to use the demo URL below, but any code changes you make will of course not be reflected.
$(document).ready(function() {
    ...
});

socket = io("https://lightful.glitch.me");
  socket.emit('newPlayer');
  socket.on('playerId', function(player_id) {
    current_player_id = player_id;
    console.log(" * You are now player", current_player_id);
  });
Verify that your code matches our source code for Step 7. Now, you can load your game on two different browsers or tabs to play two sides of a multiplayer game. Player 1 will be able to control odd-numbered orbs and player 2 will be able to control even-numbered orbs.
However, note that toggling orbs for player 1 will not affect orb state for player 2. Next, we need to synchronize game states.
8. Synchronize Game State
In this step, we will synchronize game states so that players 1 and 2 see the same orb states. If orb 1 is on for player 1, it should be on for player 2 as well. On the client-side, we will both announce and listen for orb toggles. To announce, we will simply pass the ID of the orb that is toggled.
Before both toggleOrb invocations, add the following socket.emit call.
$(document).ready(function() {
    ...
    $('.orb').on('click', function() {
        ...
        socket.emit('toggleOrb', id);
        toggleOrb(id);
    });
});
...
function clickOrb(i) {
    ...
    socket.emit('toggleOrb', i);
    toggleOrb(i);
}
Next, listen for orb toggles, and toggle the corresponding orb. Directly underneath the playerId socket event listener, add another listener for the toggleOrb event.
socket.on('toggleOrb', function(i) {
  document.querySelector("#container-orb" + i).click();
  toggleOrb(i);
});
This concludes modifications to the client-side code. Double-check that your code matches our source code for Step 8.
Server-side now needs to receive and broadcast the toggled orb ID. In the server-side index.js, add the following listener. This listener should be placed directly underneath the socket disconnect listener.
  socket.on('toggleOrb', function(i) {
    socket.broadcast.emit('toggleOrb', i);
  });
Double-check that your code matches our source code for Step 8. Now, player 1 loaded in one window and player 2 loaded in a second window will both see the same game state. With that, you have completed a multiplayer virtual reality game. The two players, furthermore, must collaborate to complete the objective. The final product will match the following.
Conclusion
This concludes our tutorial on creating a multiplayer virtual reality game. In the process, you’ve touched on a number of topics, including 3-D modeling in A-Frame VR and real-time multiplayer experiences using WebSockets.
Building off of the concepts we’ve touched on, how would you ensure a smoother experience for the two players? This could include checking that the game state is synchronized and alerting the user if otherwise. You could also make simple visual indicators for the terminal state and player connection status.
Given the framework we’ve established and the concepts we’ve introduced, you now have the tools to answer these questions and build much more.
You can find the finished source code here.
(dm, il)
From our sponsors: How To Build A Real-Time Multiplayer Virtual Reality Game (Part 2)


