Archived
Creating A Static Blog With Sapper And Strapi

Creating A Static Blog With Sapper And Strapi
Daniel Madalitso Phiri 2020-08-05T09:00:00+00:00
2020-08-05T12:34:11+00:00
In this tutorial, we will build a statically generated minimal blog with Sapper, a Svelte-based progressive JavaScript framework, for our front end, and then use Strapi, an open-source headless content management system (CMS), for the back end of our application. This tutorial is aimed at intermediate front-end developers, specifically those who want the versatility of a headless CMS, like Strapi, as well as the minimal structure of a JavaScript framework, like Sapper. Feel free to try out the demo or check out the source code on GitHub.
To go through the article smoothy, you will need the LTS version of Node.js and either Yarn or npm installed on your device beforehand. It’s also worth mentioning that you will need to have a basic understanding of JavaScript and GraphQL queries.
Before getting started, let’s get some definitions out of the way. A static-site generator is a tool that generates static websites, and a static website can be defined as a website that is sourced from purely static HTML files. For an overview of your options for static-site generators today, check out “Top 10 Static Site Generators in 2020”.
A headless CMS, on the other hand, is a CMS accessible via an API. Unlike the traditional CMS’ of the past, a headless CMS is front-end agnostic and doesn’t tie you to a single programming language or platform. Strapi’s article “Why Frontend Developers Should Use a Headless CMS” is good resource to understand the usefulness of a headless CMS.
Static-site generators, like headless CMS’, are quickly gaining mainstream appeal in the front-end web development community. Both pieces of technology bring with them a much lower barrier to entry, flexibility, and a generally better developer experience. We’ll see all this and more as we build our blog.
You might be wondering, “Why should I use this instead of the alternatives?” Sapper is based on Svelte, which is known for its speed and relatively small bundle size. In a world where performance plays a huge role in determining an effective user experience, we want to optimize for that. Developers today are spoiled for choice when it comes to front-end frameworks — if we want to optimize for speed, performance, and developer experience (like I do in this project), then Sapper is a solid choice!
So, let’s get started building our minimal blog, starting with our Sapper front end.
Sapper Front End
Our front end is built with Sapper, a framework for building extremely high-performance web apps using Svelte. Sapper, which is short for “Svelte app maker”, enables developers to export pages as a static website, which we will be doing today. Svelte has a very opinionated way of scaffolding projects, using Degit.
“Degit makes copies of Git repositories and fetches the latest commit in the repository. This is a more efficient approach than using
git clone, because we’re not downloading the entire Git history.”
First, install Degit by running npm install -g degit in your command-line interface (CLI).
Next up, run the following commands in the CLI to set up our project.
npx degit "sveltejs/sapper-template#rollup" frontend
# or: npx degit "sveltejs/sapper-template#webpack" frontend
cd frontend
npm install
npm run dev
Note: We have the option of using either Rollup or Webpack to bundle our project. For this tutorial, we will be using Rollup.
These commands scaffold a new project in the frontend directory, install its dependencies, and start a server on localhost.
If you’re new to Sapper, the directory structure will need some explaining.
Sapper’s App Structure
If you look in the project directory, you’ll see this:
├ package.json
├ src
│ ├ routes
│ │ ├ # your routes here
│ │ ├ _error.svelte
│ │ └ index.svelte
│ ├ client.js
│ ├ server.js
│ ├ service-worker.js
│ └ template.html
├ static
│ ├ # your files here
└ rollup.config.js / webpack.config.js
Note: When you first run Sapper, it will create an additional __sapper__ directory containing generated files. You’ll also notice a few extra files and a cypress directory — we don’t need to worry about those for this article.
You will see a few files and folders. Besides those already mentioned above, these are some you can expect:
package.json
This file contains your app’s dependencies and defines a number of scripts.src
This contains the three entry points for your app:src/client.js,src/server.js, and (optionally)src/service-worker.js, along with asrc/template.htmlfile.src/routes
This is the meat of the app (that is, the pages and server routes).static
This is a place to put any files that your app uses: fonts, images, and so on. For example,static/favicon.pngwill be served as/favicon.png.rollup.config.js
We’re using Rollup to bundle our app. You probably won’t need to change its configuration, but if you want to, this is where you would do it.
The directory structure is pretty minimal for the functionality that the project provides. Now that we have an idea of what our project directory looks like and what each file and folder does, we can run our application with npm run dev.
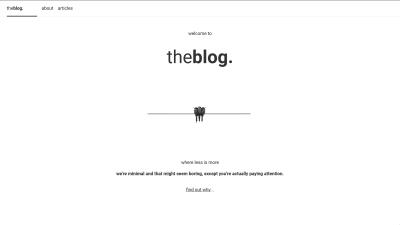
You should see the Svelte-eque starter home page of our blog.
This looks really good! Now that our front end is set up and working, we can move on to the back end of the application, where we will set up Strapi.
Strapi Back End
Strapi is both headless and self-hosted, which means we have control over our content and where it’s hosted — no server, language, or vendor lock-in to worry about, and we can keep our content private. Strapi is built with JavaScript and has a content editor built with React. We’ll use this content editor to create some content models and store actual content that we can query later on. But before we can do all of this, we have to set it up by following the instructions below.
1. Install Strapi and Create New Project
- Open your CLI.
- Run
yarn create strapi-app backend --quickstart. This will create a new folder namedbackendand build the React admin UI.
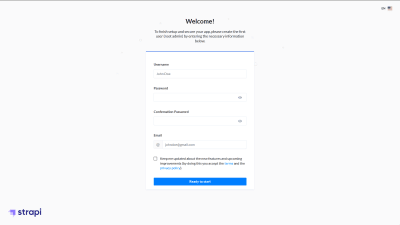
2. Create Administrator
- Navigate to http://localhost:1337/admin.
- Complete the form to create the first user, the administrator.
- Click “Ready to start”.
3. Create Blog Collection Type
- Navigate to “Content-Types Builder”, under “Plugins” in the left-hand menu.
- Click the “+ Create new collection type” link.
- Name it “blog”.
- Click “Continue”.
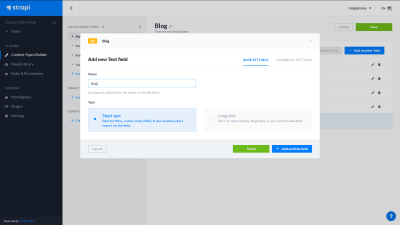
- Add a “Text field” (short text), and name it “Title”.
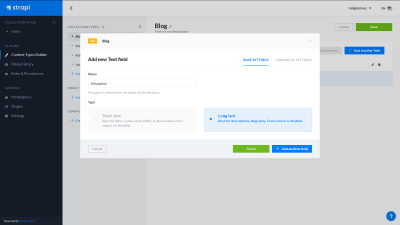
- Click the “+ Add another field” button.

- Add a “Text field” (long text), and name it “Description”.
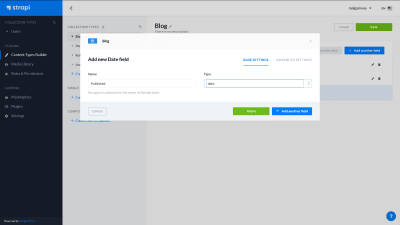
- Click the “+ Add another field” button.
- Add a “Date field” of the type “date”, and name it “Published”.
- Click the “+ Add another field” button.
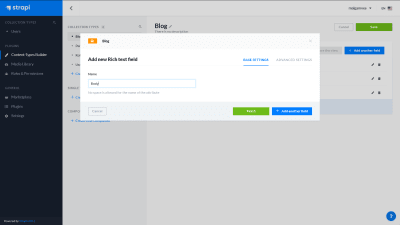
- Add a “Rich Text field”, and name it “Body”.
- Click the “+ Add another field” button.
- Add another “Text field” (short text), and name it “Slug”.
- Click the “+ Add another field” button.
- Add a “Relation field”.
- On the right side of the relation, click on the arrow and select “User”.
- On the left side of the relation, change the field name to “author”.
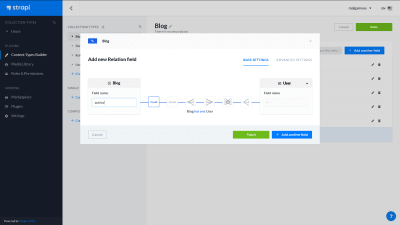
- Click the “Finish” button.
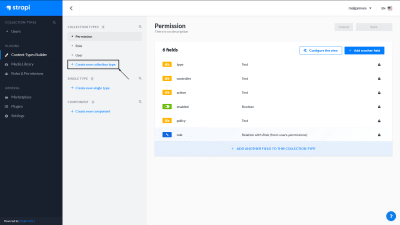
- Click the “Save” button, and wait for Strapi to restart.
When it’s finished, your collection type should look like this:

4. Add a New User to “Users” Collection Type
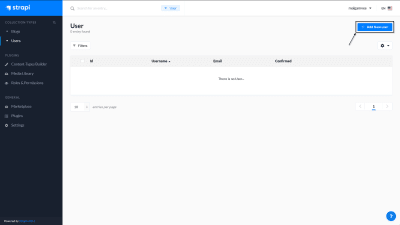
- Navigate to “Users” under “Collection Types” in the left-hand menu.
- Click “Add new user”.
- Enter your desired “Email”, “Username”, and “Password”, and toggle the “Confirmed” button.
- Click “Save”.
Now we have a new user who we can attribute articles to when adding articles to our “Blog” collection type.
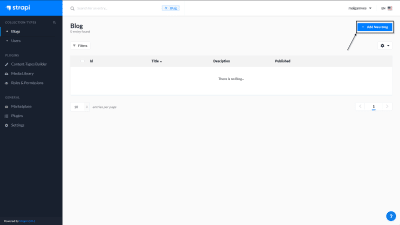
5. Add Content to “Blogs” Collection Type
- Navigate to “Blogs” under “Collection Types” in the left-hand menu.
- Click “Add new blog”.
- Fill in the information in the fields specified (you have the option to select the user whom you just created as an author).
- Click “Save”.
6. Set Roles and Permissions
- Navigate to “Roles and Permissions” under “Plugins” in the left-hand menu.
- Click the “Public” role.
- Scroll down under “Permissions”, and find “Blogs”.
- Tick the boxes next to “find” and “findone”.
- Click “Save”.

7. Send Requests to the Collection Types API
Navigate to https://localhost:1337/blog to query your data.
You should get back some JSON data containing the content that we just added. For this tutorial, however, we will be using Strapi’s GraphQL API.
To enable it:
- Open your CLI.
- Run
cd backendto navigate to./backend. - Run
yarn strapi install graphqlto install the GraphQL plugin.
Alternatively, you can do this:
- In the admin UI, navigate to “Marketplace” under “General” in the left-hand menu.
- Click “Download” on the GraphQL card.
- Wait for Strapi to restart.

When the GraphQL plugin is installed and Strapi is back up and running, we can test queries in the GraphQL playground.
That is all for our back-end setup. All that’s left for us to do is consume the GraphQL API and render all of this beautiful content.
Piecing Together Both Ends
We’ve just queried our Strapi back end and gotten back some data. All we have to do now is set up our front end to render the content that we get from Strapi via the GraphQL API. Because we are using the Strapi GraphQL, we will have to install the Svelte Apollo client and a few other packages to make sure everything works properly.
Installing Packages
- Open the CLI, and navigate to
./frontend. - Run
npm i --save apollo-boost graphql svelte-apollo moment.
Moment.js helps us to parse, validate, manipulate, and display dates and times in JavaScript.
The packages are now installed, which means we are able to make GraphQL queries in our Svelte app. The blog we’re building will have three pages: “home”, “about” and “articles”. All of our blog posts from Strapi will be displayed on the “articles” page, giving users access to each article. If we think about how that would look, our “articles” page’s route will be /articles, and then each article’s route will be /articles/:slug, where slug is what we enter in the “Slug” field when adding the content in the admin UI.
This is important to understand because we will tailor our Svelte app to work in the same way.
In./frontend/src/routes, you will notice a folder named “blog”. We don’t need this folder in this tutorial, so you can delete it. Doing so will break the app, but don’t worry: It’ll be back up and running once we make our “articles” page, which we’ll do now.
- Navigate to
./frontend/src/routes. - Create a folder named “articles”.
- In
./frontend/src/routes/articles, create a file namedindex.svelte, and paste the following code in it. - When pasting, be sure to replace
with your actual Strapi GraphQL endpoint. For your local version, this will usually behttps://localhost:1337/graphql.
<script context="module">
        import ApolloClient, { gql } from 'apollo-boost';
        import moment from 'moment';

        const blogQuery = gql`
        query Blogs {
                blogs {
                        id
                        Title
                        Description
                        Published
                        Body
                        author {
                                username
                        }
                        Slug
                }
        }
        `;
        export async function preload({params, query}) {
                const client = new ApolloClient({
                        uri: '<Your Strapi GraphQL Endpoint>',
                        fetch: this.fetch
                         });
                const results = await client.query({
                        query: blogQuery
                })
                return {posts: results.data.blogs}
        }
</script>

<script>
        export let posts;
</script>

<style>
        ul, p {
                margin: 0 0 1em 0;
                line-height: 1.5;
        }
        .main-title {
                font-size: 25px;
        }
</style>

<svelte:head>
        <title>articles</title>
</svelte:head>

<h1>recent posts</h1>

<ul>
{#each posts as post}
    <li>
          <a class="main-title" rel='prefetch' href='articles/{post.Slug}'>
            {post.Title}
          </a>
    </li>
    <p>
  {moment().to(post.Published, "DD-MM-YYYY")} ago by {post.author.username}
    </p>
{/each}
</ul>
This file represents our /articles route. In the code above, we’ve imported a few packages and then used Apollo Client to make a query: blogQuery. We then stored our query response in a variable, results, and used the preload() function to process the data needed on our page. The function then returns posts, a variable with the parsed query result.
We’ve used Svelte’s #each block to loop through the data from Strapi, displaying the title, date of publication, and author. Our tag, when clicked, goes to a page defined by the slug that we entered for our post in Strapi’s admin UI. This means that when the link is clicked, we open up a page for a particular article, and the slug is used to identify that article.
For our /articles/:slug route, create a file named [slug].svelte, in ./src/routes/articles, and paste the following code:
<script context="module">
        import ApolloClient, { gql } from 'apollo-boost';
        import moment from 'moment';

        const blogQuery = gql`
        query Blogs($Slug: String!) {
                blogs: blogs(where: { Slug: $Slug }) {
                        id
                        Title
                        Description
                        Published
                        Body
                        author {
                                username
                        }
                        Slug
                }
                }
        `;
        export async function preload({params, query}) {
                const client = new ApolloClient({
                        uri: '<Your Strapi GraphQL Endpoint>',
                        fetch: this.fetch
                         });
                const results = await client.query({
                        query: blogQuery,
                        variables: {"Slug" : params.slug}
                })
                return {post: results.data.blogs}
        }
</script>

<script>
        export let post;
</script>

<style>
        .content :global(h2) {
                font-size: 1.4em;
                font-weight: 500;
        }
        .content :global(pre) {
                background-color: #f9f9f9;
                box-shadow: inset 1px 1px 5px rgba(0,0,0,0.05);
                padding: 0.5em;
                border-radius: 2px;
                overflow-x: auto;
        }
        .content :global(pre) :global(code) {
                background-color: transparent;
                padding: 0;
        }
        .content :global(ul) {
                line-height: 1.5;
        }
        .content :global(li) {
                margin: 0 0 0.5em 0;
        }
</style>

<svelte:head>
        <title>an amazing article</title>
</svelte:head>

{#each post as post}
                <h2>{post.Title}</h2>
                <h3>{moment().to(post.Published)} by {post.author.username}</h3>

                <div class='content'>
                {@html post.Body} </div>

{/each}

<p>⇺<a href="articles"> back to articles</a></p>
Note: In Svelte, dynamic parameters are encoded using [brackets]. Our [slug].svelte file lets us add routes for different posts dynamically.
Just like in routes/articles/index.svelte, here we’ve imported a few packages, and then used Apollo Client to make a query: blogQuery. This query is different because we’re filtering our data to make sure it returns a specific blog post. The params argument in our preload() function lets us access params.slug, which is the slug of the current page (that is, the slug of this particular blog post). We used params.slug as a variable in our GraphQL query so that only the data with a slug matching the slug of our web page is returned. We then stored our query response in a variable (results), and our preload() function returns posts, a variable with the parsed query result.
Finally, we displayed our post’s title, publication date, and body (wrapped in Svelte’s {@html} tag).
That’s it. We can now dynamically display pages for any posts added to Strapi’s back end.
We can now work on the “about” and “home” pages. In ./frontend/src/routes, paste this code in the about.svelte file:
<svelte:head>
        <title>about</title>
</svelte:head>

<h1>about this site</h1>

<p>
minimalist web design really let's the content stand out and shine.
this is why a simple website design is the first choice of so many artists, photographers,
and even some writers. they want their creative content to be the center of attention,
rather than design elements created by someone else.
</p>

<p>this minimal blog is built with <a href="https://svelte.dev/">svelte</a> and <a href="https://strapi.io/">strapi</a>
images by <a href="https://unsplash.com/@glencarrie">glen carrie</a> from unsplash
</p>
For our home page, let’s go to ./frontend/src/routes and paste the following code in index.svelte:
<style>
        h1, figure, p {
                text-align: center;
                margin: 0 auto;
        }
        h1 {
                font-size: 2.8em;
                font-weight: 400;
                margin: 0 0 0.5em 0;
        }
        figure {
                margin: 0 0 1em 0;
        }
        img {
                width: 100%;
                max-width: 400px;
                margin: 0 0 1em 0;
        }
        p {
                margin: 1em auto;
                padding-bottom: 1em;
        }
        @media (min-width: 480px) {
                h1 {
                        font-size: 4em;
                }
        }
</style>

<svelte:head>
        <title>a minimal sapper blog</title>
</svelte:head>
<p>welcome to</p>
<h1>the<b>blog.</b></h1>

<figure>
        <img alt='the birds on a line' src='bird-bg.png'>
        <figcaption>where less is more</figcaption>
</figure>

<p>
<strong>
we're minimal and that might seem boring, except you're actually paying attention.
</strong>
</p>
<p class="link"><a href="about">find out why</a>...</p>
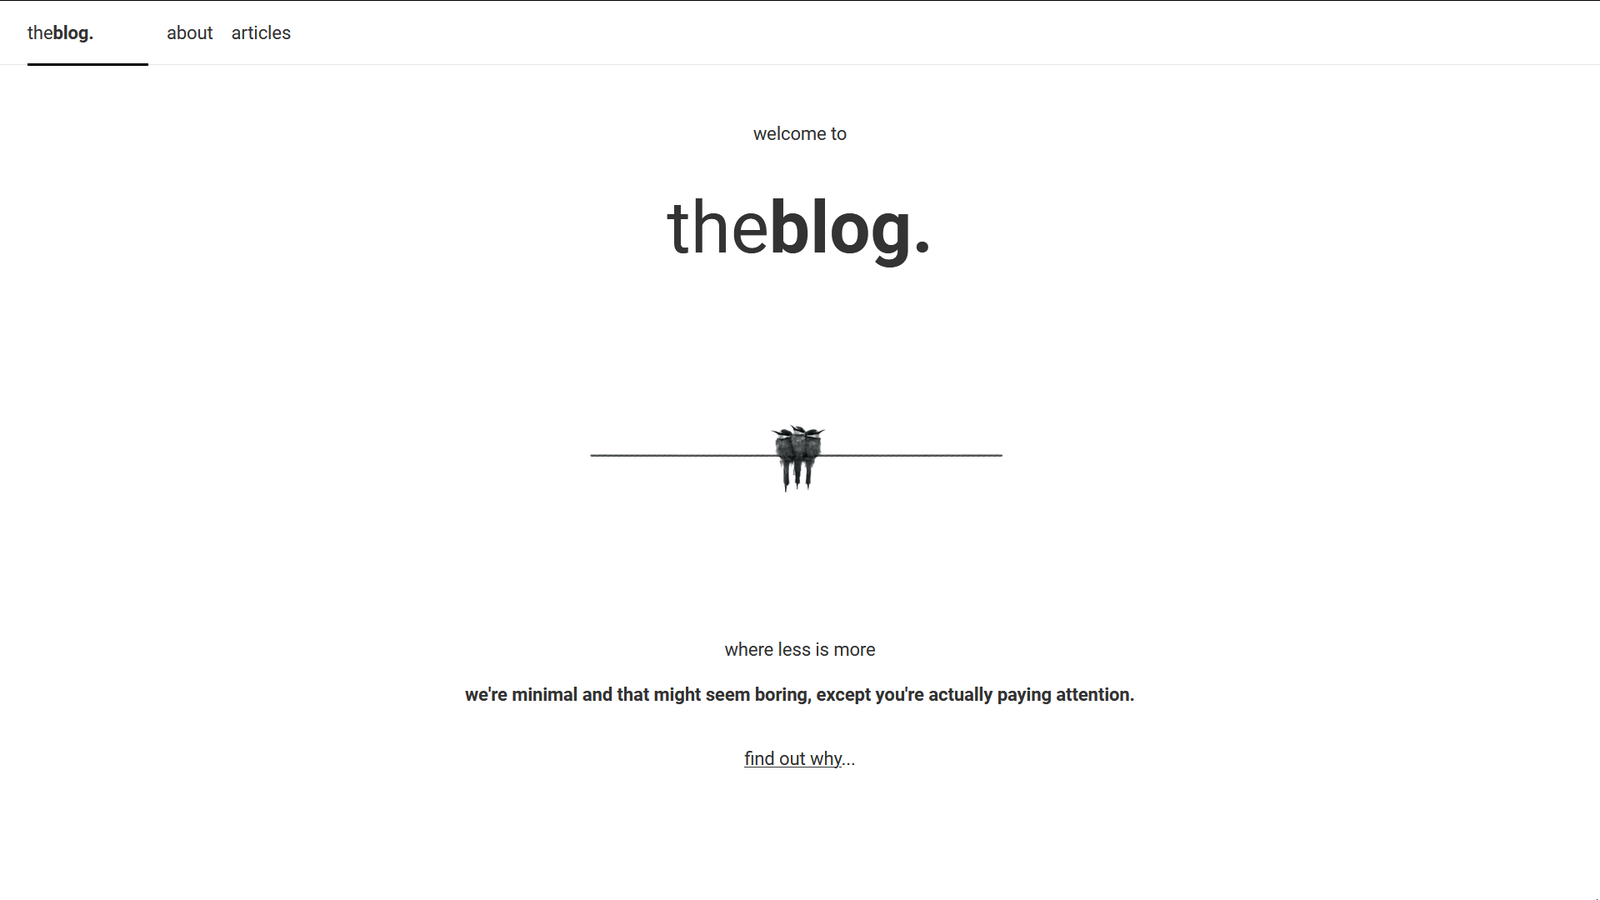
We’ve created all the pages needed in order for our app to run as expected. If you run the app now, you should see something like this:
Pretty sweet, yeah?
Locally, everything works great, but we want to deploy our static blog to the web and share our beautiful creation. Let’s do that.
Deploy To Netlify
We’re going to deploy our application to Netlify, but before we can do that, log into your Netlify account (or create an account, if you don’t already have one). Sapper gives us the option to deploy a static version of our website, and we’ll do just that.
- Navigate to
./frontend. - Run
npm run exportto export a static version of the application.
Your application will be exported to ./frontend/sapper/export.
Drag your exported folder into Netlify, and your website will be live in an instant.
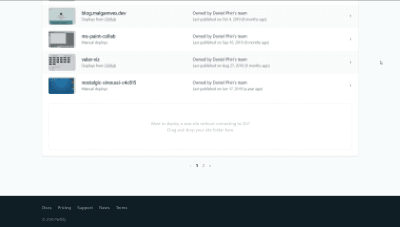
Optionally, we can deploy our website from Git by following Netlify’s documentation. Be sure to add npm run export as the build command and __sapper__/export as the base directory.
We also have the option to deploy to with Vercel (formally ZEIT, as mentioned in Sapper’s documentation).
Conclusion
That was fun, right? We just built a static blog with Sapper and Strapi and deployed it to Netlify in less than 15 minutes? Besides the stellar developer experience, Strapi and Sapper are such a delight to work with. They bring a fresh perspective to building for the web, and this tutorial is a testament to that. We definitely aren’t limited to static websites, and I can’t wait to see what you all build after this. Share your projects with me on Twitter. I can’t wait to see them. Take care, till next time!
Resources
- “Sapper — The New JavaScript Framework You Seriously Need to Try”, John Hannah, JavaScript Report
- Docs, Sapper
- “Why Frontend Developers Should Use a Headless CMS”, Daniel Madalitso Phiri, Strapi
- “Strapi Starter Nuxt Blog”, Maxime Castres, Strapi
- “Top 10 Static Site Generators in 2020”, Daniel Madalitso Phiri, Strapi
(ks, ra, al, yk, il)
From our sponsors: Creating A Static Blog With Sapper And Strapi


